

You may be surprised by the number of foods that require fermentation. Bread, cured meats, cheeses. Beer, wine, certain coffees and teas. Sauerkraut, miso, yogurt.
Not only are these foods and beverages tasty, but they share a characteristic that is essential for life. Our bodies are ecosystems teeming with trillions of bacteria — both good and bad — and fermented foods offer the healthy strains of bacteria our systems need to stay in balance. In short, if you eat enough raw sauerkraut, the bad guys are less likely to wreak havoc on your immune system. (For more on the health benefits of good bacteria, see “Why Your Microbiome Matters“.)
While you can find probiotic-rich fermented foods throughout your grocery store, making your own is easy — and fun. These recipes offer simple, good-for-your-gut food that you can try on your own at home.
Coconut-Water Kefir
Often made with various kinds of dairy or nondairy milks, kefir can also be easily made from water or coconut water. This recipe is adapted from www.culturesforhealth.com, which is also a good source for kefir grains.

Makes 1 quart | Hands-on preparation time 5 minutes | Total preparation time 24 to 48 hours
Ingredients:
- 1 quart coconut water
- 3 tbs. live kefir grains
- 1 tbs. organic sugar
- Optional flavorings: 1/2 cup berries (pictured) or diced melon, or one diced apple and a cinnamon stick
Special Equipment:
- 1 1/2-quart carafe
- 6-x-6-inch square of cheesecloth
- Rubber band
Directions:
- Place all the ingredients together in a jar or carafe, cover with cheesecloth, and secure with a rubber band.
- Set in a draft-free area for 24 to 48 hours for the culture to develop. Taste for desired sweetness level, then store in the refrigerator for up to three weeks.
Green-Tea Kombucha
Kombucha is a pleasantly tart probiotic drink. You can also make this with black tea (though not flavored or decaf tea), fruit juices, and chopped fresh fruit and herbs. There’s a lot of sugar used in the first fermentation, but don’t worry: It’s for the SCOBY (symbiotic culture of bacteria and yeast) to eat, not you. This recipe is inspired by Mastering Fermentation by Mary Karlin, www.happyherbalist.com, and www.kombuchakamp.com; both websites are great sources for starter liquid and SCOBY.

Makes 3 quarts | Hands-on preparation time 30 minutes | Total preparation time One to one and a half weeks
First Fermentation:
- 12 cups filtered water (do not use chlorinated water)
- 4 to 6 tsp. loose-leaf unflavored, caffeinated green tea in a tea infuser or strainer (or 4 to 6 tea bags)
- 1 cup unrefined cane sugar
- 8 oz. starter liquid
- 1 SCOBY
Special Equipment:
- Heatproof bowl
- 1 gallon-size glass jar or crock
- 8-x-8-inch square of cheesecloth
- Rubber band
Directions First Fermentation:
- Bring 4 cups of the water to a boil and pour over tea in a heatproof bowl. Add sugar and stir until the sugar is dissolved. Steep the tea for 30 minutes and remove the leaves from the water.
- Add the remaining 8 cups of water. Cool to room temperature and add the mixture to your jar or crock.
- Add the starter liquid and SCOBY. Cover the jar with the cheesecloth and secure with the rubber band. Store in a warm, dark location for seven to 10 days. Taste it every few days to check for the transition from sweetness to sour. When the kombucha tastes similar to your original starter liquid, or more tart than sweet, it is ready to bottle for the second fermentation.
Second Fermentation:
- 2 cups filtered water (do not use chlorinated water)
- 4 tsp. green tea, in a tea infuser (or 4 tea bags)
- 1/2 cup organic cane sugar
- 4 tbs. grated fresh ginger
- 12 cups first-fermentation kombucha
Special Equipment:
- Eight 12-oz. bottles with tight-fitting caps
Directions Second Fermentation:
- Boil 1 cup of the water and add the tea. Add the sugar and stir to dissolve.
- Steep the tea for 10 minutes and remove the leaves from the water.
- Add the remaining cup of water and allow to cool to 96 degrees F.
- Add the ginger and pour about 2 ounces of the tea mixture into each bottle.
- Fill bottles with the first-fermentation kombucha, leaving a 1/2 inch of space at the top of each bottle.
- Screw on the caps tightly. Keep sealed bottles in a warm, dark place, such as in a cupboard or closet or any spot where the temperature will stay at 65 to 80 degrees F. The warmer your spot, the faster the kombucha will ferment. Every couple of days, open the bottles to “burp” them (this reduces the slim chance that they will explode).
- When the kombucha has reached its desired fizziness, usually in about five to seven days, it is ready to chill in the refrigerator.
- Drink within one month.
Yogurt

Greek Yogurt
Greek yogurt is thick and hearty. Make it yourself to avoid the artificial sweeteners and thickeners in some commercial brands. This recipe is inspired by Molly Sheridan at www.wonderlandkitchen.com.
Makes 6 cups | Hands-on preparation time 20 minutes | Total preparation time 16 hours
Ingredients:
- 8 cups whole milk
- 4 tbs. plain whole-milk yogurt with live, active cultures
Special Equipment:
- Kitchen thermometer
- 2 quart-size canning jars with lids
- Fine-mesh strainer
- Cheesecloth
Directions:
- Set oven to warm, or 200 degrees F.
- In a heavy, 3-quart saucepan, bring the milk to 180 degrees F over medium heat. Remove from heat and allow to cool to 110 degrees F. Whisk in the yogurt until smooth.
- Pour the milk mixture into the canning jars and seal with the lids.
- Turn the oven off. Place the jars in the oven and close the door. Allow the yogurt to incubate for at least eight hours (or up to 24 hours if you like it extra tangy). Check to see that it has thickened. Once it has, place it in the refrigerator for at least six hours.
- Line a large fine-mesh strainer with two layers of cheesecloth and place over a large bowl. Pour the yogurt into the strainer and allow it to drain for two hours or until it is as thick as you like it.
- Reserve the whey that collects in the bowl for another recipe, such as pickled vegetables. Store the yogurt in the refrigerator for up to two weeks.
Maple-Vanilla Greek Yogurt
Making your own flavored yogurt is a breeze — and you can control the ingredients and sugar level to boot. This is a perfect base for granola-fruit parfaits.
Makes 1 cup | Hands-on preparation time 5 minutes | Total preparation time Eight hours
Ingredients:
- 1-inch piece of vanilla bean, split crosswise (or 1 tbs. high-quality vanilla extract)
- 1 cup strained whole-milk yogurt or Greek yogurt
- 1 tbs. maple syrup or honey
Directions:
- Scrape the vanilla-bean seeds into the yogurt and stir together, adding the vanilla-bean pod as well.
- Refrigerate in a small container overnight to infuse the vanilla flavor into the yogurt.
- Drizzle with the maple syrup or honey before serving.
(Try your homemade yogurt with this power parfait recipe.)
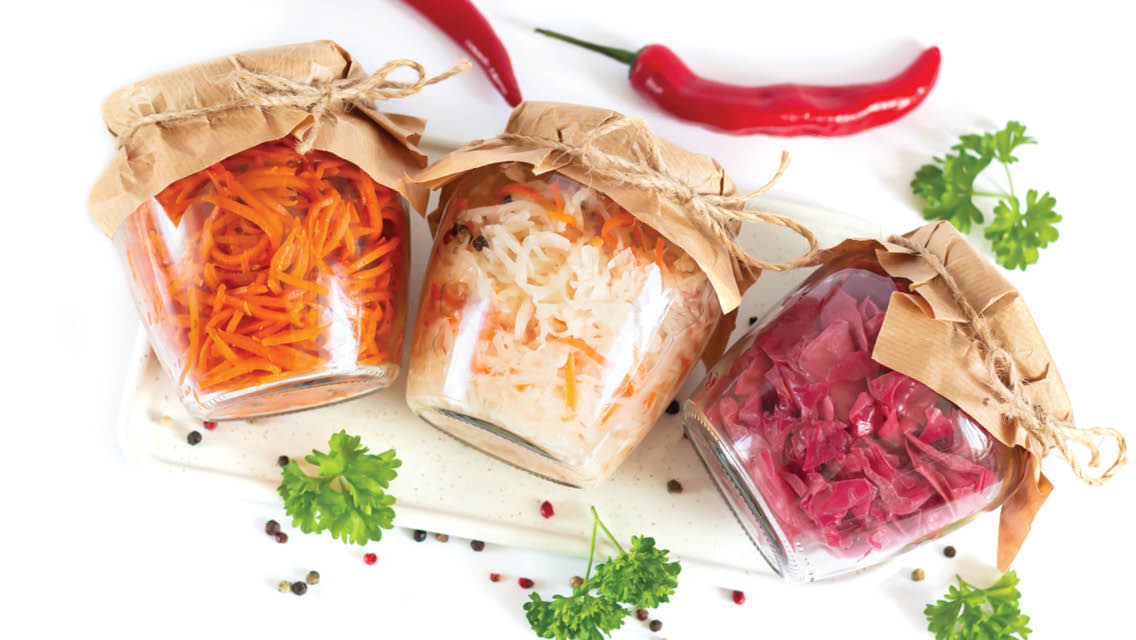
Gingered-Carrot Relish
This lacto-fermented relish makes a lovely condiment for Asian-inspired grilled meats and fish, and it is wonderful in a salad, sandwich, or rice-bowl dish. Adapted from Nourishing Traditions, by Sally Fallon.

Makes 1 pint | Hands-on preparation time 30 minutes | Total preparation time three days, but store for one to four months for better flavor
Ingredients:
- 2 cups grated carrots, tightly packed
- 1 tbs. freshly grated gingerroot
- 1 1/2 tsp. sea salt
- 2 tbs. whey (if not available use an additional 1 1/2 tsp. salt)
Special Equipment:
- 1 pint-sized canning jar, with lid
Directions:
- In a bowl, mix all ingredients together and press with the rounded bottom of a soup ladle.
- Transfer the carrot mixture into a jar, and press down firmly with the soup ladle until the juices cover the carrots. The top of the carrots should be at least 1 inch below the top of the jar.
- Cover the jar tightly and leave at room temperature for about three days and then transfer to the refrigerator. These can be enjoyed after being refrigerated for at least three days, but will improve with age.
Wine Vinegar
Wine vinegar is a great way to use up leftover wine. Red wine produces the fullest flavor, but rosé or white will work as well. This recipe is inspired by Ideas in Food, by Aki Kamozawa and H. Alexander Talbot.

Makes 3 1/2 cups | Hands-on preparation time 5 minutes | Total recipe time two to three weeks
Ingredients:
- 1 1/2 cups organic apple-cider vinegar (Bragg or another type that has a “mother”)
- 2 cups red wine
Special Equipment:
- 1 quart-size jar with a loose-fitting lid (or use a 2-quart jar if you want to keep adding to it as a continuous ferment)
- Cheesecloth
- Rubber band
Directions:
- Combine the vinegar and wine in the clean jar. Cover with the cheesecloth and secure with the rubber band; this will keep fruit flies out.
- Rest the jar lid loosely on top to allow for airflow. Let the vinegar sit in a cool, dark location for one week.
- After a week, check the vinegar for flavor. You may use it now, or add another cup of wine to it and let it sit for at least another week to allow the flavor to mature.
- When your vinegar has aged one to two weeks, pour it into a bottle, saving the sediment in your base jar, and seal it with a cap.
- Add more wine to the base to continuously produce your own vinegar.
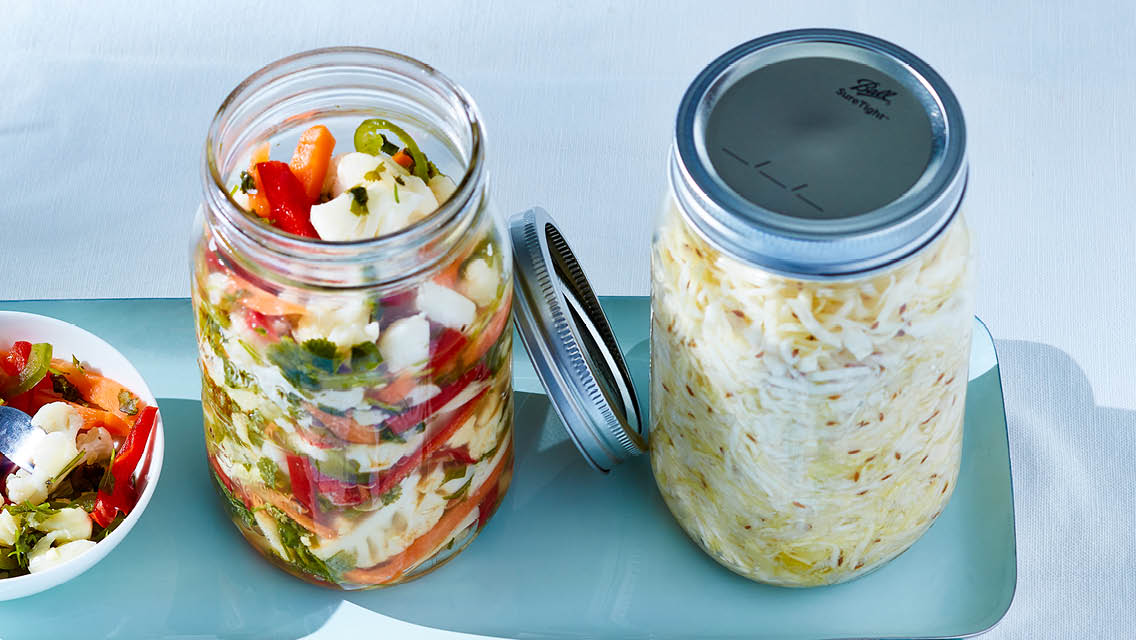
Caraway Sauerkraut and Summer Vegetable Pickles

Caraway Sauerkraut
You can make this sauerkraut with just one head of cabbage. You don’t need a special crock or a root cellar; it may simply be stored in the refrigerator. This recipe is adapted from Nourishing Traditions, by Sally Fallon.
Makes 1 quart | Hands-on preparation time 30 minutes | Total preparation time three days
Ingredients:
- 1 medium head of cabbage, cored and shredded
- 1 tbs. caraway seeds
- 1 tbs. sea salt
- 4 tbs. whey (if not available, use an additional 1 tbs. salt)
Special Equipment:
- 1 quart-size, wide-mouth canning jar with lid
Directions:
- In a large bowl, mix all the ingredients together. Press with the rounded bottom of a ladle to release the juices.
- Transfer the cabbage into the canning jar and press down firmly until the juices cover the cabbage. The top of the cabbage should be at least 1 inch below the top of the jar.
- Cover tightly and keep at room temperature for about three days before transferring to the refrigerator. The sauerkraut may be eaten immediately, but it tastes best if you store it in the refrigerator for at least a week.
Summer Vegetable Pickles
These tasty lacto-fermented vegetables are great with meals or as a snack. This recipe is inspired by Nourishing Traditions, by Sally Fallon.
Makes about 1 quart | Hands-on preparation time 30 minutes | Total preparation time one week, but store for one to four months for better flavor
Ingredients:
- 2 jalapeño peppers, deseeded and thinly sliced (optional)
- 1 cup red bell pepper strips
- 1 1/2 cups carrot sticks
- 4 cups bite-size cauliflower pieces
- 1 bunch cilantro, coarsely chopped
- 2 cloves garlic, smashed
- 1 tbs. sea salt
- 4 tbs. whey (if not available, use an additional 1 tbs. salt)
- Filtered water (do not use chlorinated water)
Special Equipment:
- 1 quart-size, wide-mouthed canning jar with lid
Directions:
- In a large bowl, mix all the ingredients together except the water. Press the ingredients lightly with the rounded bottom of a soup ladle.
- Place in the canning jar and press down with the ladle so that liquid rises to the top of the vegetables.
- Add filtered water as necessary to cover the vegetables. The top of the vegetables should be at least 1 inch below the top of the jar.
- Cover tightly and keep at room temperature for about two days before transferring to the refrigerator. The vegetables are ready to consume after a week in the refrigerator and will improve with age.
Watch this quick tutorial on how to make your first batch of Summer Vegetable Pickles.
This article originally appeared as “Get Cultured” in the June 2022 issue of Experience Life.

This Post Has 0 Comments