

The hollow-body hold is a beginner-friendly gymnastics and Pilates skill, but its core-strengthening properties are anything but basic.
The move begins with a crunch that draws shoulders and feet off the floor, creating a curved shape that stretches the length of the spine, from neck to pelvis. From this point, there’s a spectrum of ways to progress to a fully extended hollow, with arms and legs outstretched. (See “Progress Your Hollow,” below.)
The hollow hold works the body’s anterior chain — the muscles in the front of the body — including abs, diaphragm, hip flexors, and quads. In addition to building strength, stability, and body control, it boasts back-friendly positioning by placing the body into a posterior pelvic tilt. In fact, the hollow position can be carried over to other strength moves, such as a hollow-body floor press, as well as prone (face-down) positions like the hollow-body plank, whose traditional variations can place pressure on the lower back, causing discomfort or pain.
Because the move can be modified to match each person’s unique skill and fitness level, it’s not a risky exercise, although incorrect form may cause some neck and lower-back discomfort. The main downside would be not doing the exercise — and missing out on its rewards.
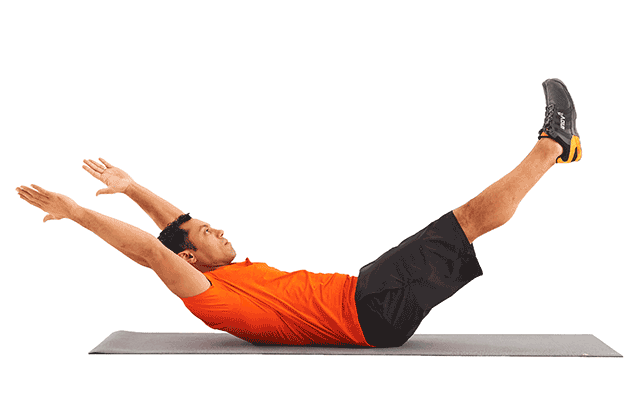
- Lie on your back, knees pulled up toward your chest.
- Press your lower back into the floor and lift your head and upper back a few inches, as though you were doing a crunch.
- Extend your arms overhead and your legs outward, feet and hands hovering at about a 45-degree angle with the floor.
- Maintain that position as long as you can with good form. Begin with 10-second holds and work up to holding for 30 seconds.
Progress Your Hollow
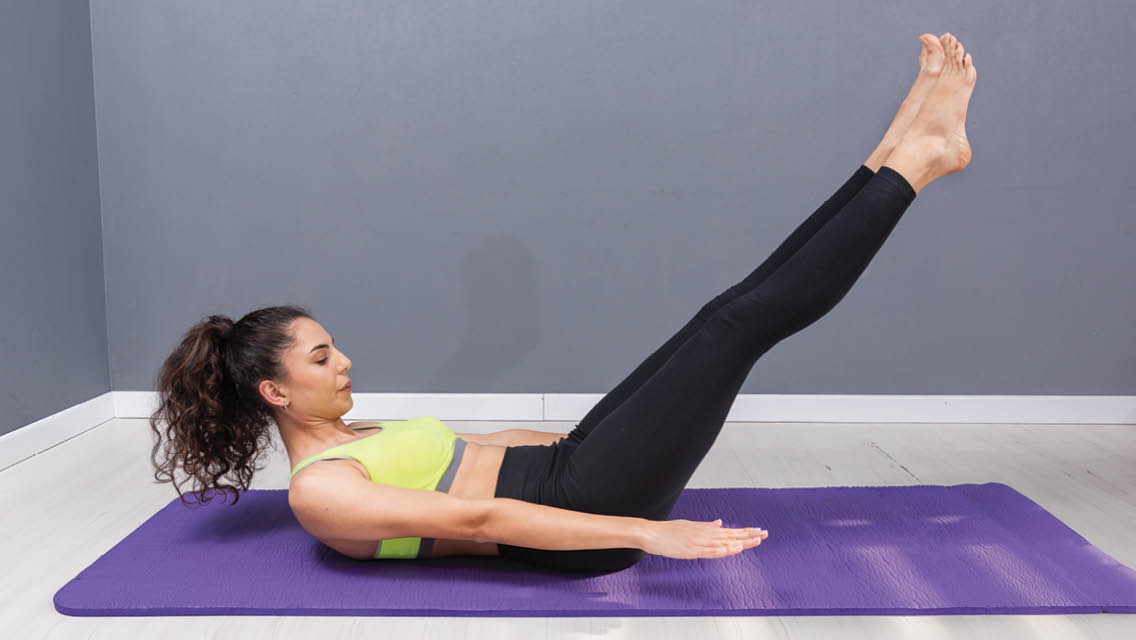
Make It Easier: Bend your knees, keeping toes pointed and heels drawn close to your glutes. Raise your arms and hold them close to your sides, actively reaching fingertips toward your toes and engaging your lats as if pushing down on an imaginary box. Extend your legs straight up and gradually lower them without sacrificing the hollow shape.
Make It Harder: Lower your legs as close to the floor as possible without losing the hollow shape in your midsection. Raise your arms completely overhead without lowering your shoulders to the floor.
The Hollow Hold with Press
- Begin lying on the floor holding a dumbbell in each hand.
- Supporting the dumbbells close to your chest, find your expression of the hollow-body hold — whether that means knees close to your chest, legs extended straight overhead, legs extended close to the floor, or something in between.
- Staying curled up in the crunch, press the dumbbells straight over your chest toward the ceiling. Take care that your shoulders don’t descend to the floor as you press. (You might think about doing an extra crunch as you press to maintain the shoulder position.)
The Hollow Hold Rock
- Once you are able to maintain the fully extended hollow-body hold, begin in that position.
- Then, gently begin rocking your body back and forth, shifting your weight toward your feet and back toward your head.
- The rocking should be subtle, controlled, and smooth — if it feels like your lower back is slapping the floor, you must reengage the curve in your lower back.
- Repeat for the desired number of reps, as long as you can maintain good form.
The Hollow Plank
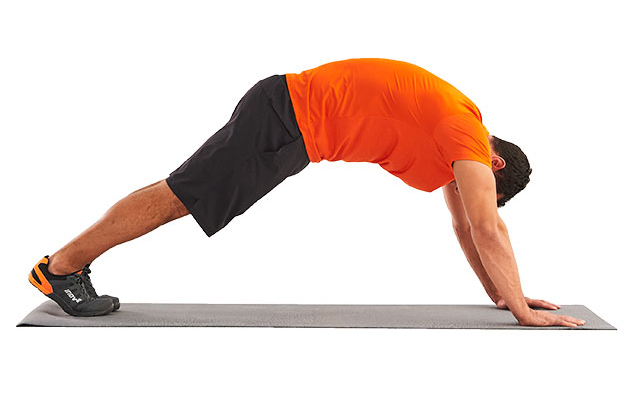
- Begin on all fours, knees under hips and wrists under shoulders.
- Initiate the movement by tucking your tailbone. You will feel a stretch through the lower back as your pelvis tips backward.
- Holding this tucked position, draw in your abs as if a string were pulling your belly button toward your spine. Allow your back to round until your spine forms an arch from neck to tailbone. It is common to relax and flatten the lower back as you round through the shoulders; keep your attention on your lower back and draw in your lower abs to prevent this from happening.
- Once you are in this active, upside-down hollow position, extend your legs one at a time until you are in a rounded plank position.
- Hold for as long as you can maintain good form, about 10 to 30 seconds.
This Post Has 0 Comments